|
|
Post by shin on Aug 23, 2015 1:04:46 GMT
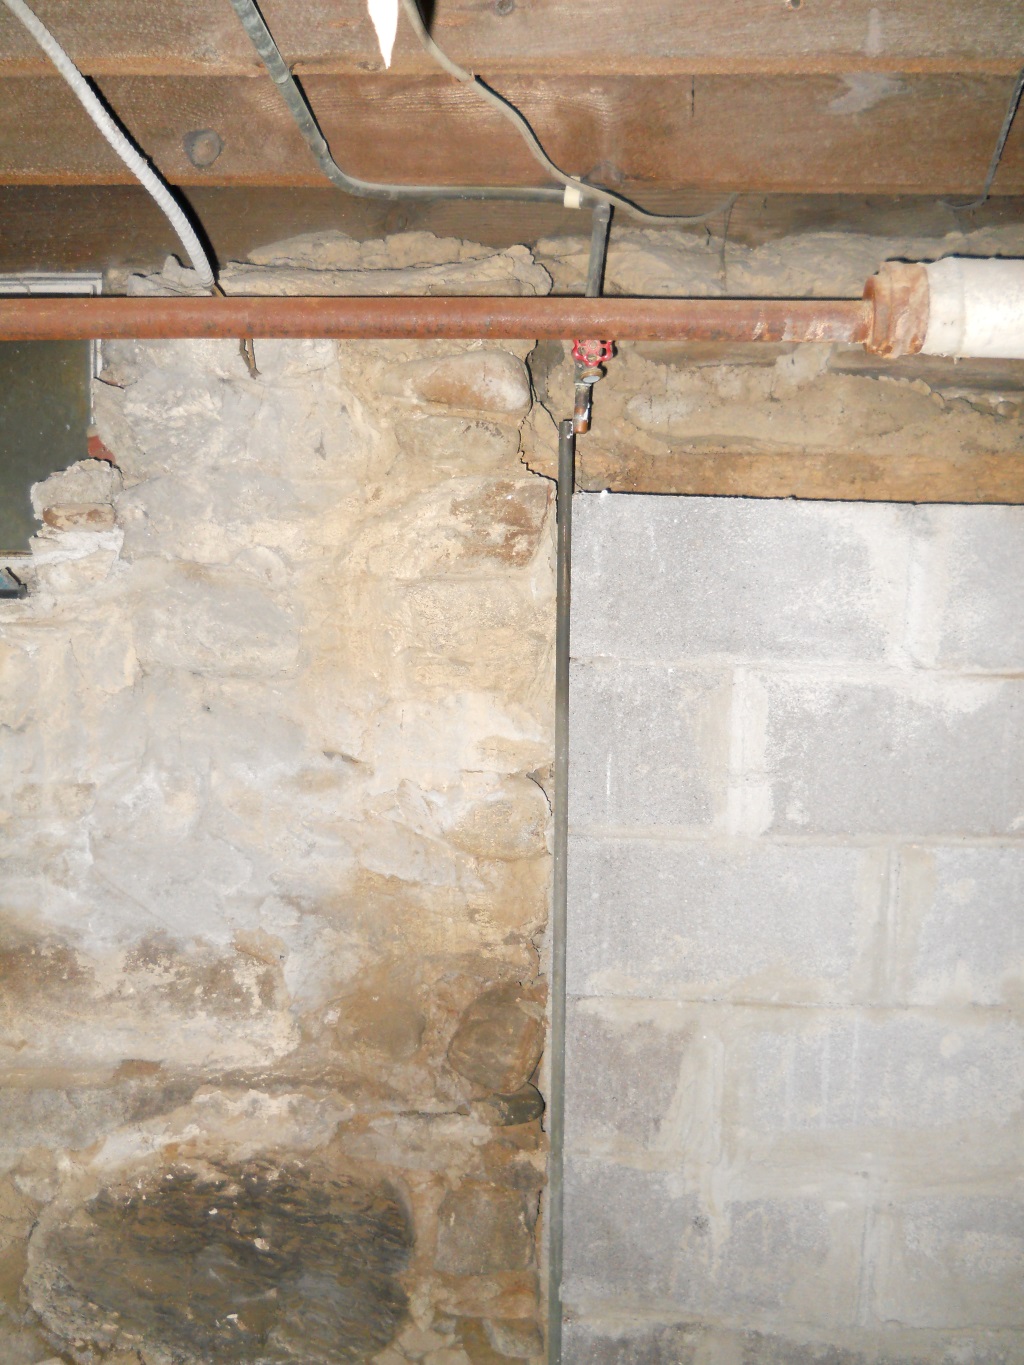
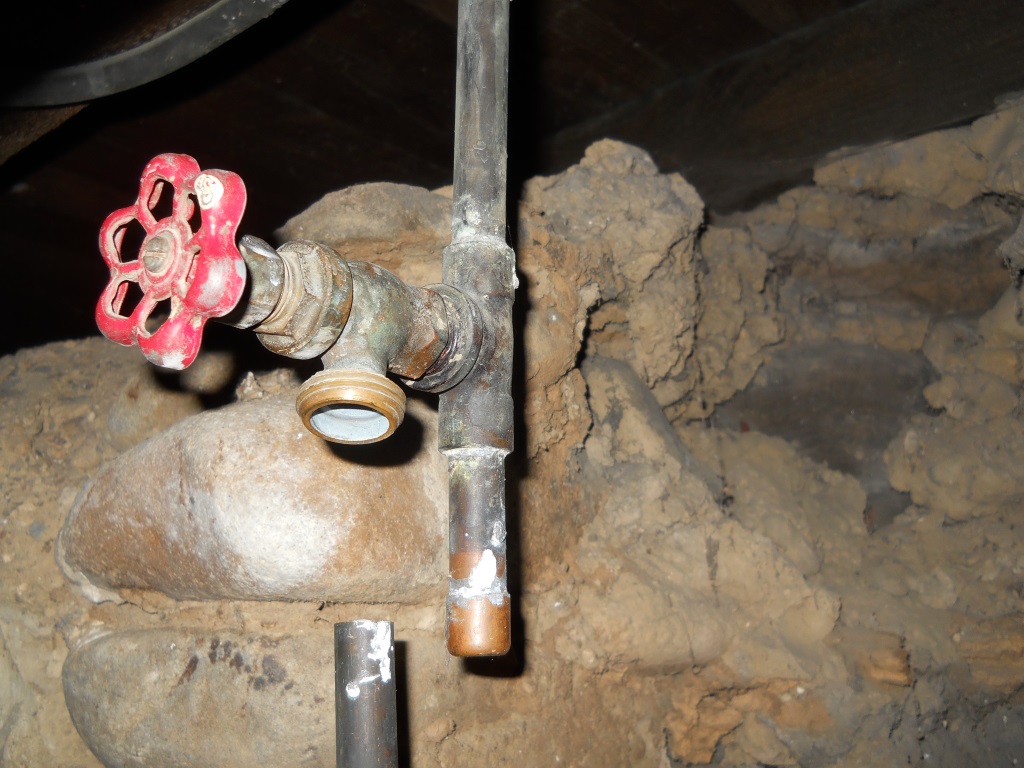
Well, I'm no plumber, so asides from putting in some kitchen sink faucets this'll be a first. I figure though it's a good intro to plumbing, as there's a handy shutoff valve available. This house has a lot of benefits, but one of its lacks is -- an exterior faucet to hook up the garden hose. That's an issue. There's an interior one in the cellar at the end of some pipe right near a thin concrete wall. I didn't realize how thin it was until I compared it with the window to the left of it. So I figure, no problem getting through there, I just have to do the plumbing right, it's a short shot to the exterior for a faucet.   I thought I'd ask some advice on what I'd need to purchase to do this properly. Still hunting through the big box tool stores to see what the materials list possibly could be. |
|
|
|
Post by shin on Aug 23, 2015 1:38:35 GMT
So far unless I've made a mistake somewhere I figure --
This is a 3/4" pipe, so I figure -- 3 feet of copper pipe, I'll cut short a bit to fit through the wall, an elbow, a male 3/4" fitting, a brass garden hose faucet, solder, propane torch, brush. Already have sand paper, quickcrete, and a saw.
Not sure what I need to line the pipe with going through the wall.
|
|
Deleted
Deleted Member
Posts: 0
|
Post by Deleted on Aug 23, 2015 2:29:07 GMT
|
|
|
|
Post by shin on Aug 23, 2015 2:41:50 GMT
Oh now that's a good thought, sounds like the knowledge you get with experience. Keep that part inside. I'll do that.
|
|
Deleted
Deleted Member
Posts: 0
|
Post by Deleted on Aug 23, 2015 2:52:47 GMT
I would put in a sleeve. PVC pipe big enough to pass the fitting, mortar or silicone it in, depending on size of hole made, then caulk the gap, inside and outside....James
|
|
|
|
Post by shin on Aug 23, 2015 4:05:48 GMT
I was thinking of that as possibility, yes in the end I'll do that.
Measured the pipes again looks like 1/2" copper pipe, not 3/4", didn't know what I was doing the first time measured. The circumference is 2".
|
|
|
|
Post by nimrod on Oct 5, 2015 4:35:03 GMT
You don't say where you are. If it gets below freezing go with Jwal10's suggestion on the sillcock faucet. It has to slope downward so the spigot is the lowest point for it to drain properly. Use a masonary drill bit in a hammer drill to go through the cement. This won't go through rock well. Yes 1/2 inch copper, measured inside. Outside is 5/8. Make hole 3/4 and caulk.
|
|
|
|
Post by beowoulf90 on Oct 7, 2015 11:52:58 GMT
|
|
|
|
Post by shin on Oct 7, 2015 19:03:11 GMT
Yes, I got all the supplies, copper pipe, sillcock faucet, propane torch, solder.
Just got to learn how to solder for the first time. If I can't get the knack of it, I'll go get some of that pipe bonding stuff and keep it simple.
It does go below freezing out here.
|
|
|
|
Post by nimrod on Oct 8, 2015 4:48:22 GMT
Soldering copper pipe is not that hard.
Make sure there is no water in the pipe, you won't be able to get it hot enough to melt the solder if there is water evaporating. If you have a slow drip you can't stop shove a wad of bread up inside the pipe just before you solder. It will absorb the water long enough for you to solder and then dissolve and come out the faucet. You may notice the smell of toast cooking. Hope it doesn't make you hungry.
Cut the pieces to be soldered. Use a rat tail file to remove the ridge inside the pipe on the end or minerals will accumulate there. Dry fit to be sure it is correct.
Clean off all the oxidized copper from the outside of the pipe and the inside of the fitting where you are going to solder. You want bright shiny copper. Use sandpaper, emery cloth, or a wire brush to clean off the copper. They make wire brushes specifically for this.
Apply a thin coating of flux to the outside of the pipe and the inside of the fitting where they join. put the pipe and fitting together. If you are doing a T or elbow you can do all the connections at the same time.
I see you have a valve close to the end of the pipe. You don't want to get the valve hot and melt the washer inside. Wrap a wet towel around the pipe close to the valve and between the valve and where you will be soldering to help keep the valve cool. A scrap piece of sheetrock is a good heat shield to prevent starting nearby combustibles on fire. You can drill a hole in the sheetrock, put the pipe through it, and solder. Just break the sheetrock apart to get it off when you are done. Keep some water around in case you start the house on fire.
Heat the elbow or T just back from the connection. You want the whole area where the fitting and pipe touch hot enough to melt the solder. Move the torch flame around so you don't heat just one side of the connection, this is especially important on 3/4 inch pipe and up. Touch the solder to the joint where the pipe goes into the fitting. It will melt when the pipe is hot enough and capillary action will suck the melted solder into the joint, even if the solder is flowing uphill.
Do not put the pink parts directly under the joint while you are soldering. Melted solder on your flesh results in pain you won't soon forget.
|
|